 SEARCH OUR RESOURCE CENTER
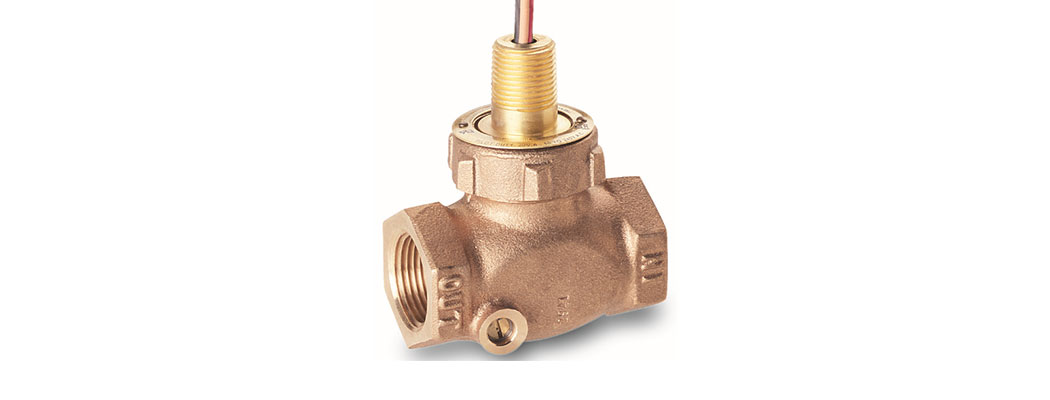
The FS-200 can be field serviceable by removing the bonnet assembly and repairing or replacing it. The bonnet assembly consists of the following main components: bonnet nut, shuttle assembly, Viton O-ring, the reed switch and wires, the magnetic ring, and the retaining rings. It is essentially everything except the FS-200 body. Typically, there are no failure modes for the body, and it also allows for existing plumbing fixtures to remain in place.

The bonnet assembly can be removed by first shutting flow of the liquid to the FS-200. Next you can loosen the bonnet nut and pull out the assembly. You may choose to remove the retainer ring ‘A’ for complete shuttle disassembly or remove ring ‘B’ to disassemble the disc only. You can also clean the bonnet assembly without removing the retainer rings with a fine brush and mild cleaning chemicals.
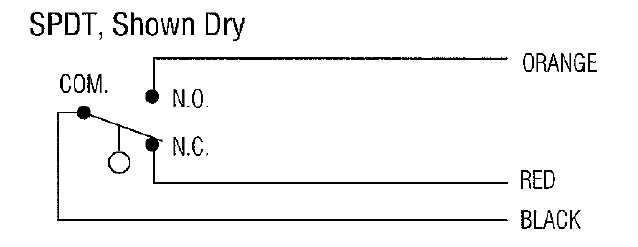
You can test the bonnet assembly’s functionality by pushing the ring magnet up and compressing the spring. This will be simulating flow and will close the Normally Open switch. Check for continuity between the orange and black wires. When the ring magnet is returned to the down position the Normally Open switch will be open again, simulating No Flow (flow beneath set point). You will have no continuity between orange and black, but should have continuity on the Normally Closed switch, the red and black wires.
When installing the bonnet assembly back into the FS-200 body, make sure the O-ring is installed and within the top of the bonnet nut, so it doesn’t drop down and become damaged from the threads. Recommended torque to ensure a proper seal with the bonnet nut is 10-15 ft lbs.
Please refer to the “FS-200 Bonnet Assembly P/N” list for your correct bonnet assembly replacement.